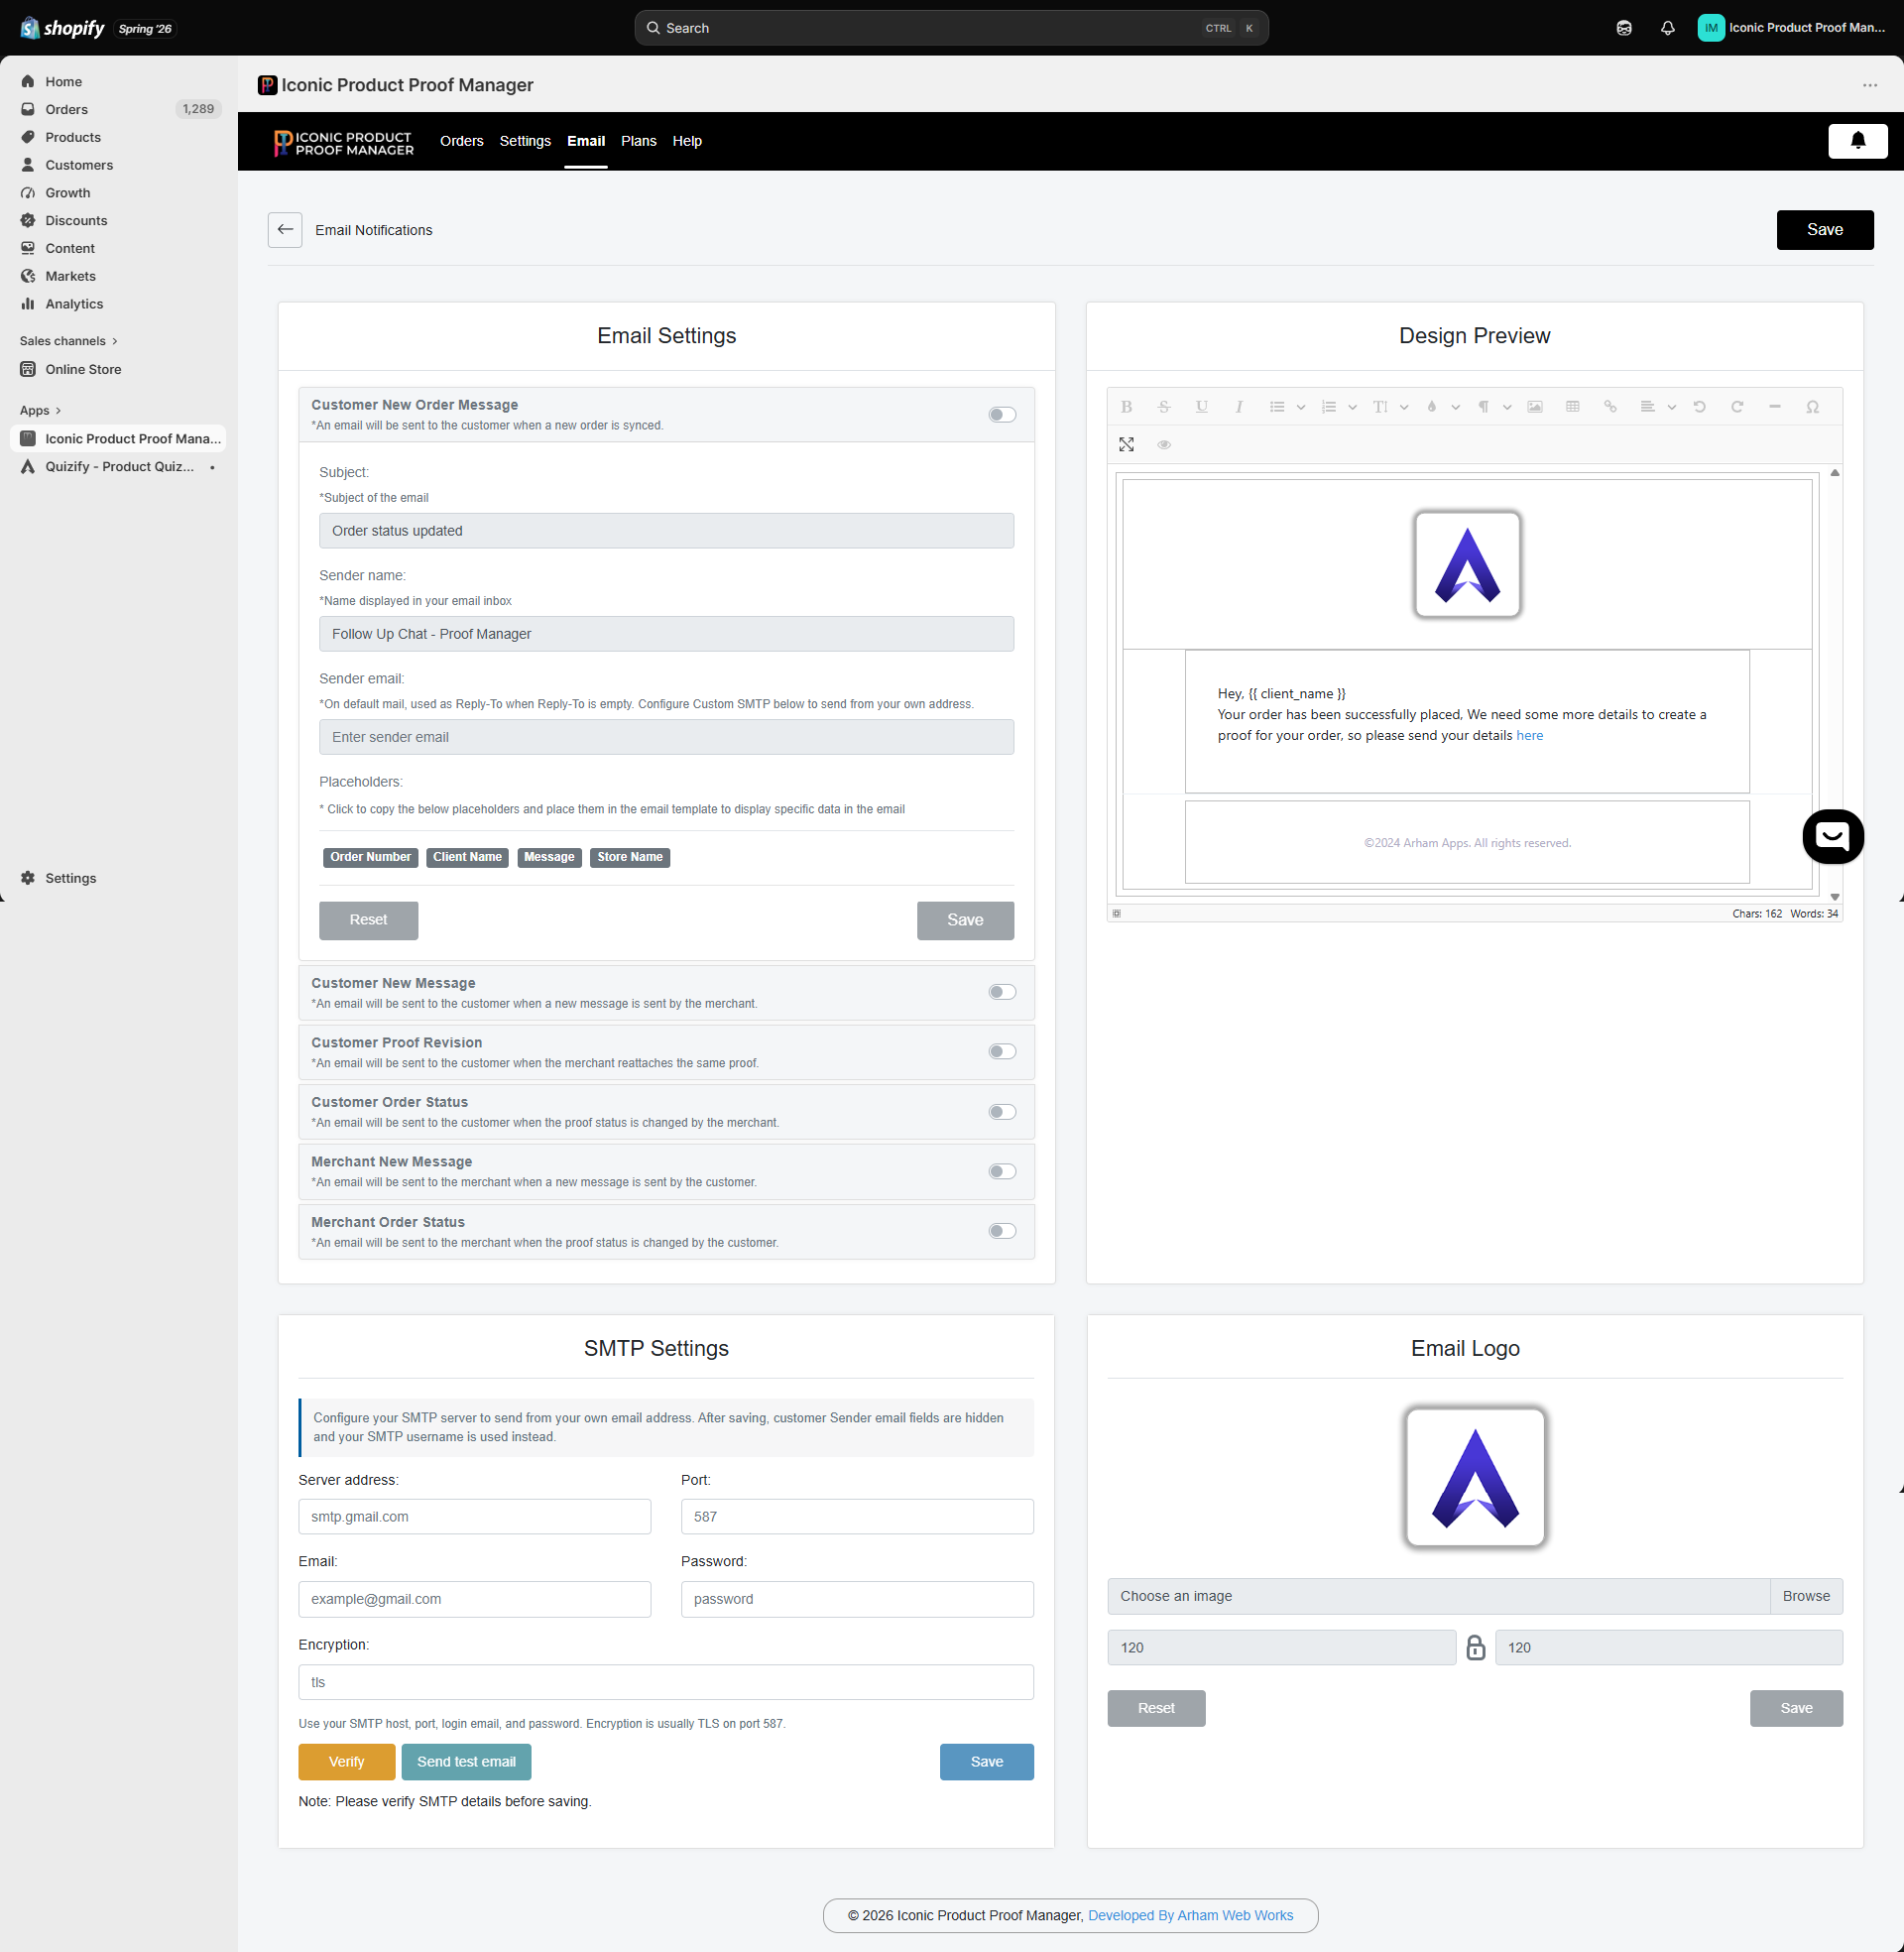
By default, notification emails are sent from the app’s shared mail service, using your Sender email as the Reply-To address. If you’d rather send from your own domain or mailbox, configure Custom SMTP in Email → SMTP Settings.
SMTP settings fields for server address, port, email, password and encryption
Custom SMTP is available on the Basic Plan and above. See Plans & Pricing.

Fields

FieldExampleNotes
Server addresssmtp.gmail.comYour mail provider’s SMTP host
Port587587 for TLS, 465 for SSL
Emailexample@gmail.comThe mailbox you’re authenticating as
PasswordFor providers like Gmail, use an app password, not your regular login password
EncryptiontlsUsually tls on port 587, or ssl on port 465

Setting it up

1

Enter your SMTP details

Fill in server address, port, email, password, and encryption.
2

Verify

Click Verify to test the connection before saving. This confirms the app can authenticate with your mail server without sending anything yet.
3

Send a test email

Click Send test email to deliver a sample message and confirm end-to-end delivery.
4

Save

Once verified, click Save. From now on, all notification emails send through your SMTP server instead of the app’s default mail, and your Sender email fields are replaced by your SMTP username.
Always verify before saving — incorrect SMTP credentials will silently stop notification emails from sending until fixed.