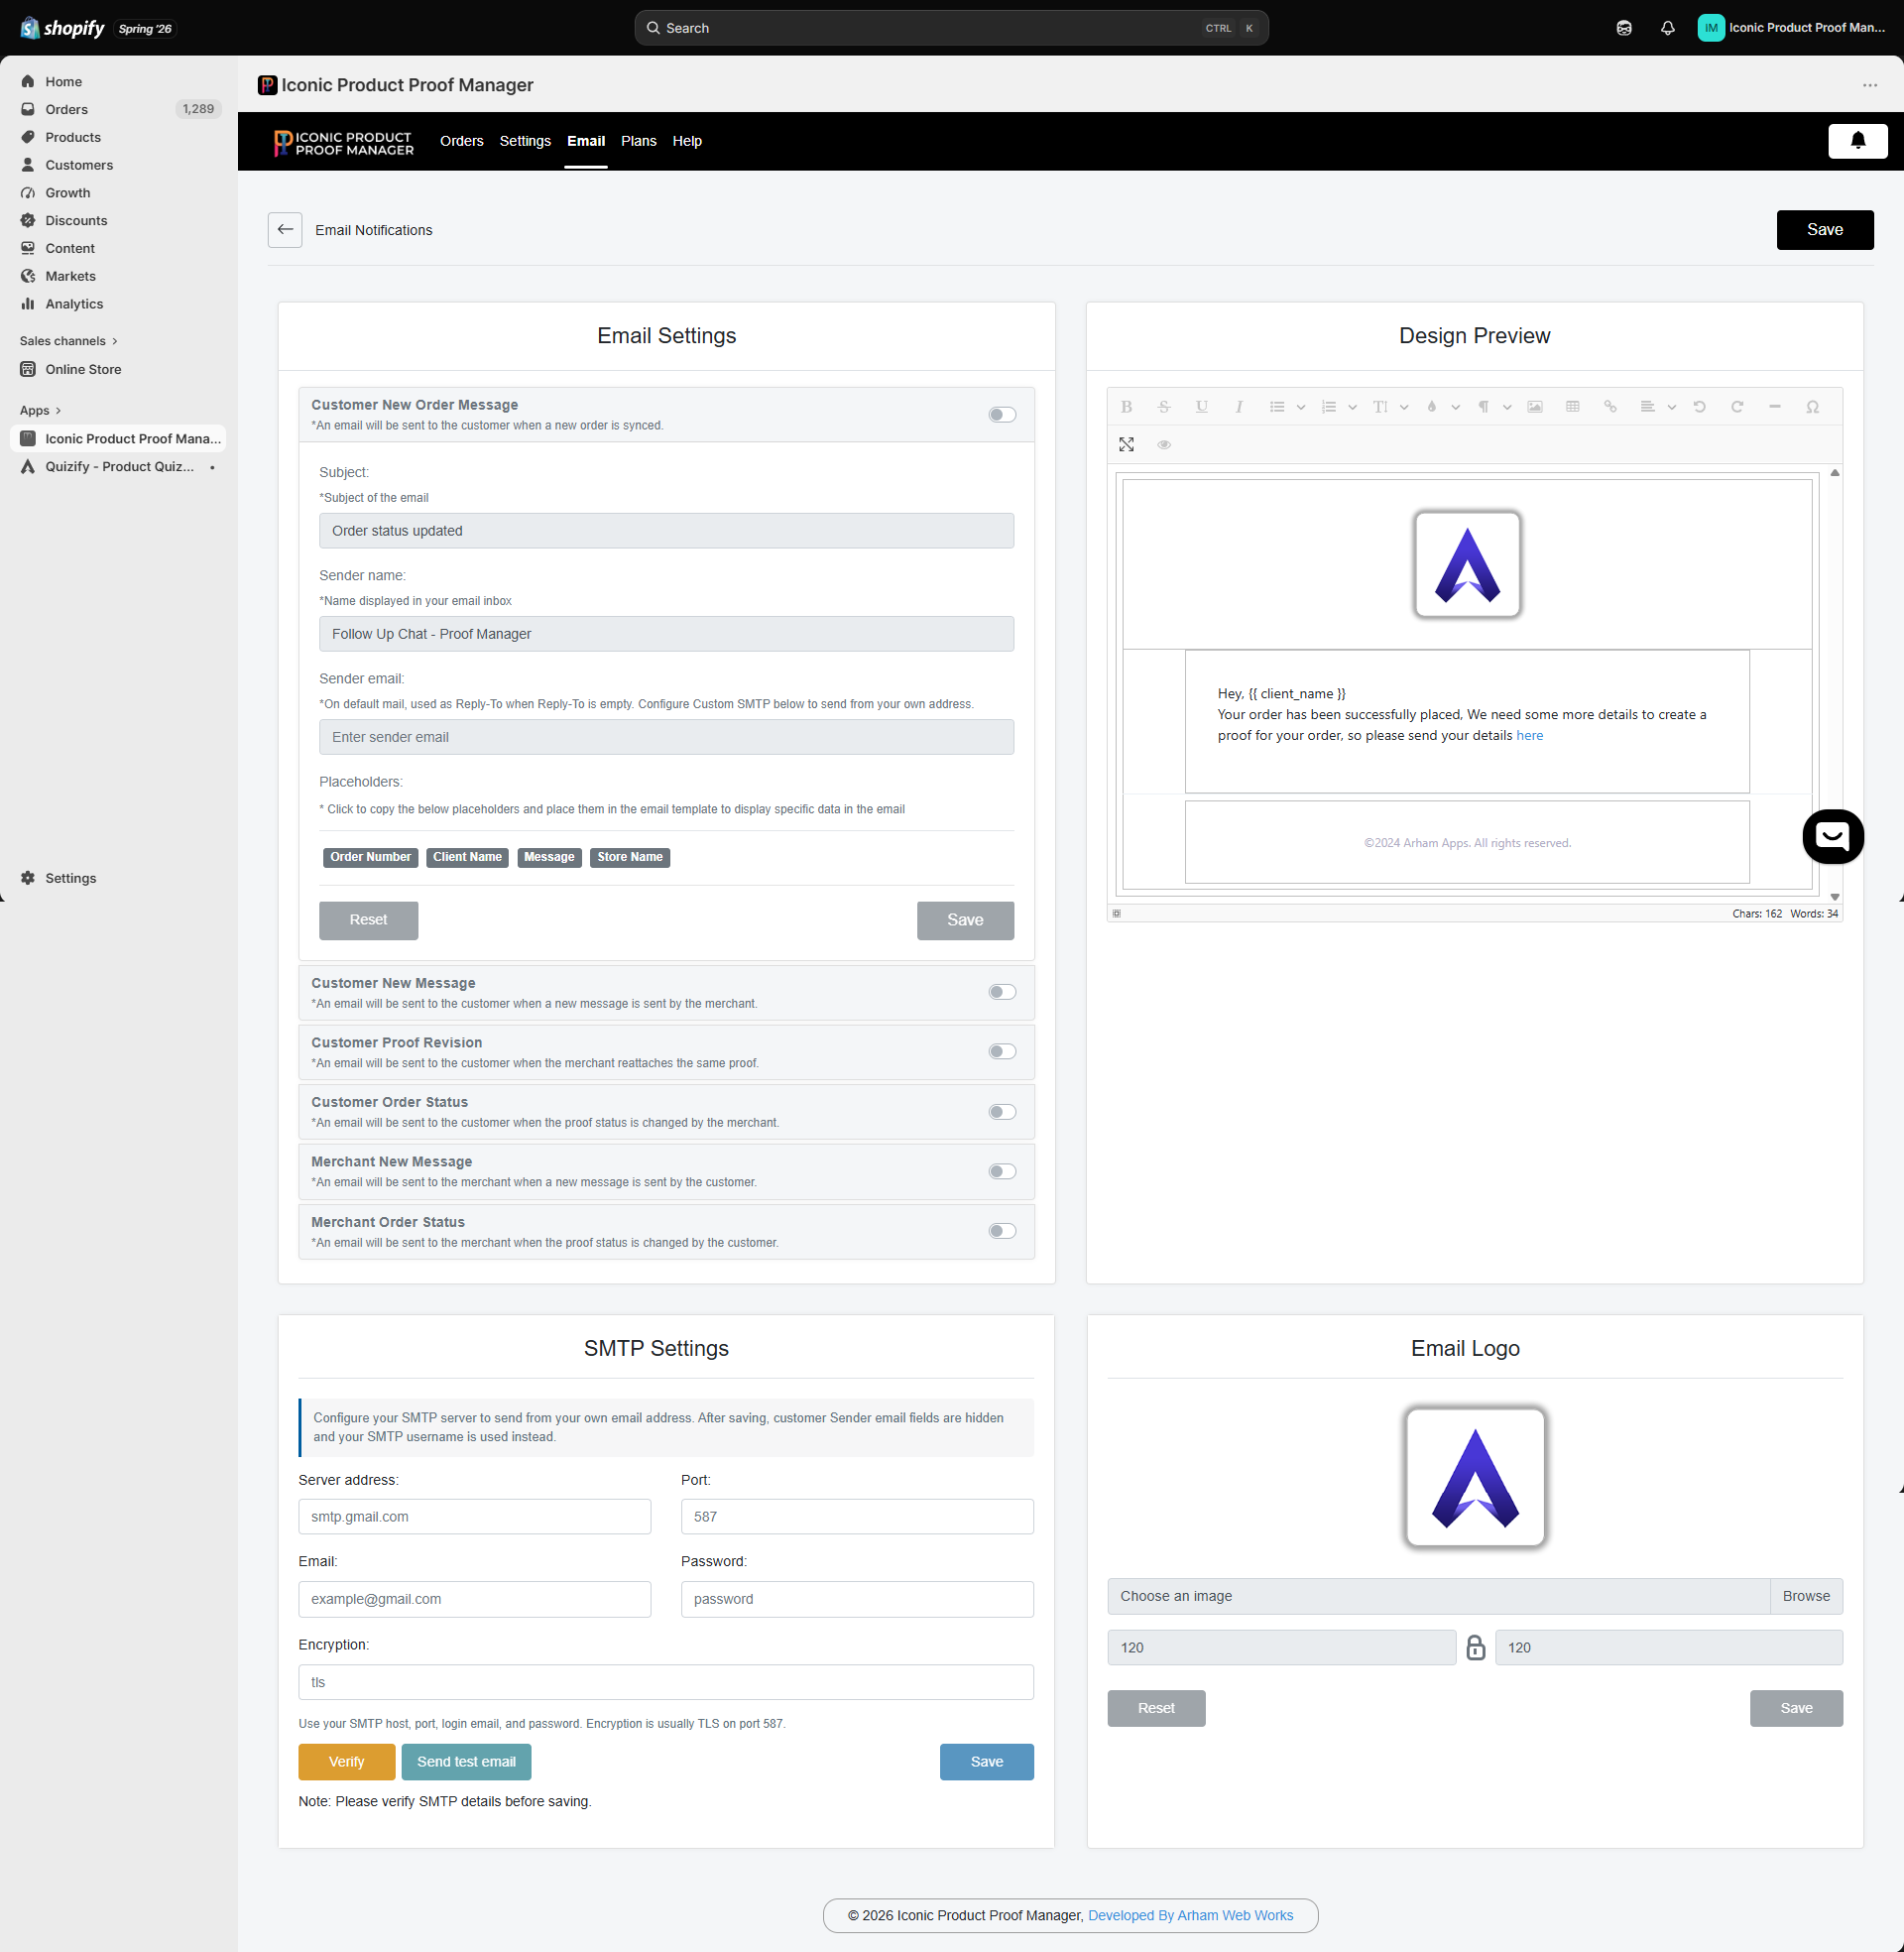
Email → Email Notifications controls every automatic email the app can send, with a live Design Preview so you can see changes before saving.
Email notification settings with design preview

Notification types

Each notification has its own on/off toggle, subject line, sender name, and (where applicable) sender email:
NotificationSent toTriggered when
Customer New Order MessageCustomerA new order is synced — invites the customer to submit details for their proof
Customer New MessageCustomerYou send a new message on their order
Customer Proof RevisionCustomerYou reattach a revised proof file to the same conversation
Customer Order StatusCustomerYou change the order’s merchant status
Merchant New MessageYouThe customer sends a new message
Merchant Order StatusYouThe customer approves or rejects a proof
The Customer New Order Message (labeled Customer New Order Message on the toggle list) is the entry point for the whole workflow — if it’s off, customers on newly synced orders won’t know they need to submit details or view their proof unless you message them directly.

Editing a template

For each notification you can set:
  • Subject — the email subject line
  • Sender name — the name shown in the customer’s inbox
  • Sender email — used as the Reply-To address when sending from the app’s default mail; configure Custom SMTP to send from your own address instead
  • Design — the email body, edited in the rich text editor with the Design Preview on the right

Placeholders

Click a placeholder chip to insert it into the template — it’s replaced with real order data when the email is sent:
PlaceholderInserts
Order NumberThe Shopify order number
Client NameThe customer’s name
MessageThe message content (for message-related emails)
Store NameYour store name
Click Save under each section to store your changes, or Reset to restore the default template. Under Email Logo, upload an image to replace the default logo shown at the top of every notification email. Set the display width and height in pixels, then Save. Use Reset to remove your custom logo and go back to the default.