> ## Documentation Index
> Fetch the complete documentation index at: https://proof-manager-docs.geticonicapps.com/llms.txt
> Use this file to discover all available pages before exploring further.
# Notification Settings
> Configure the automatic emails sent to customers and to you
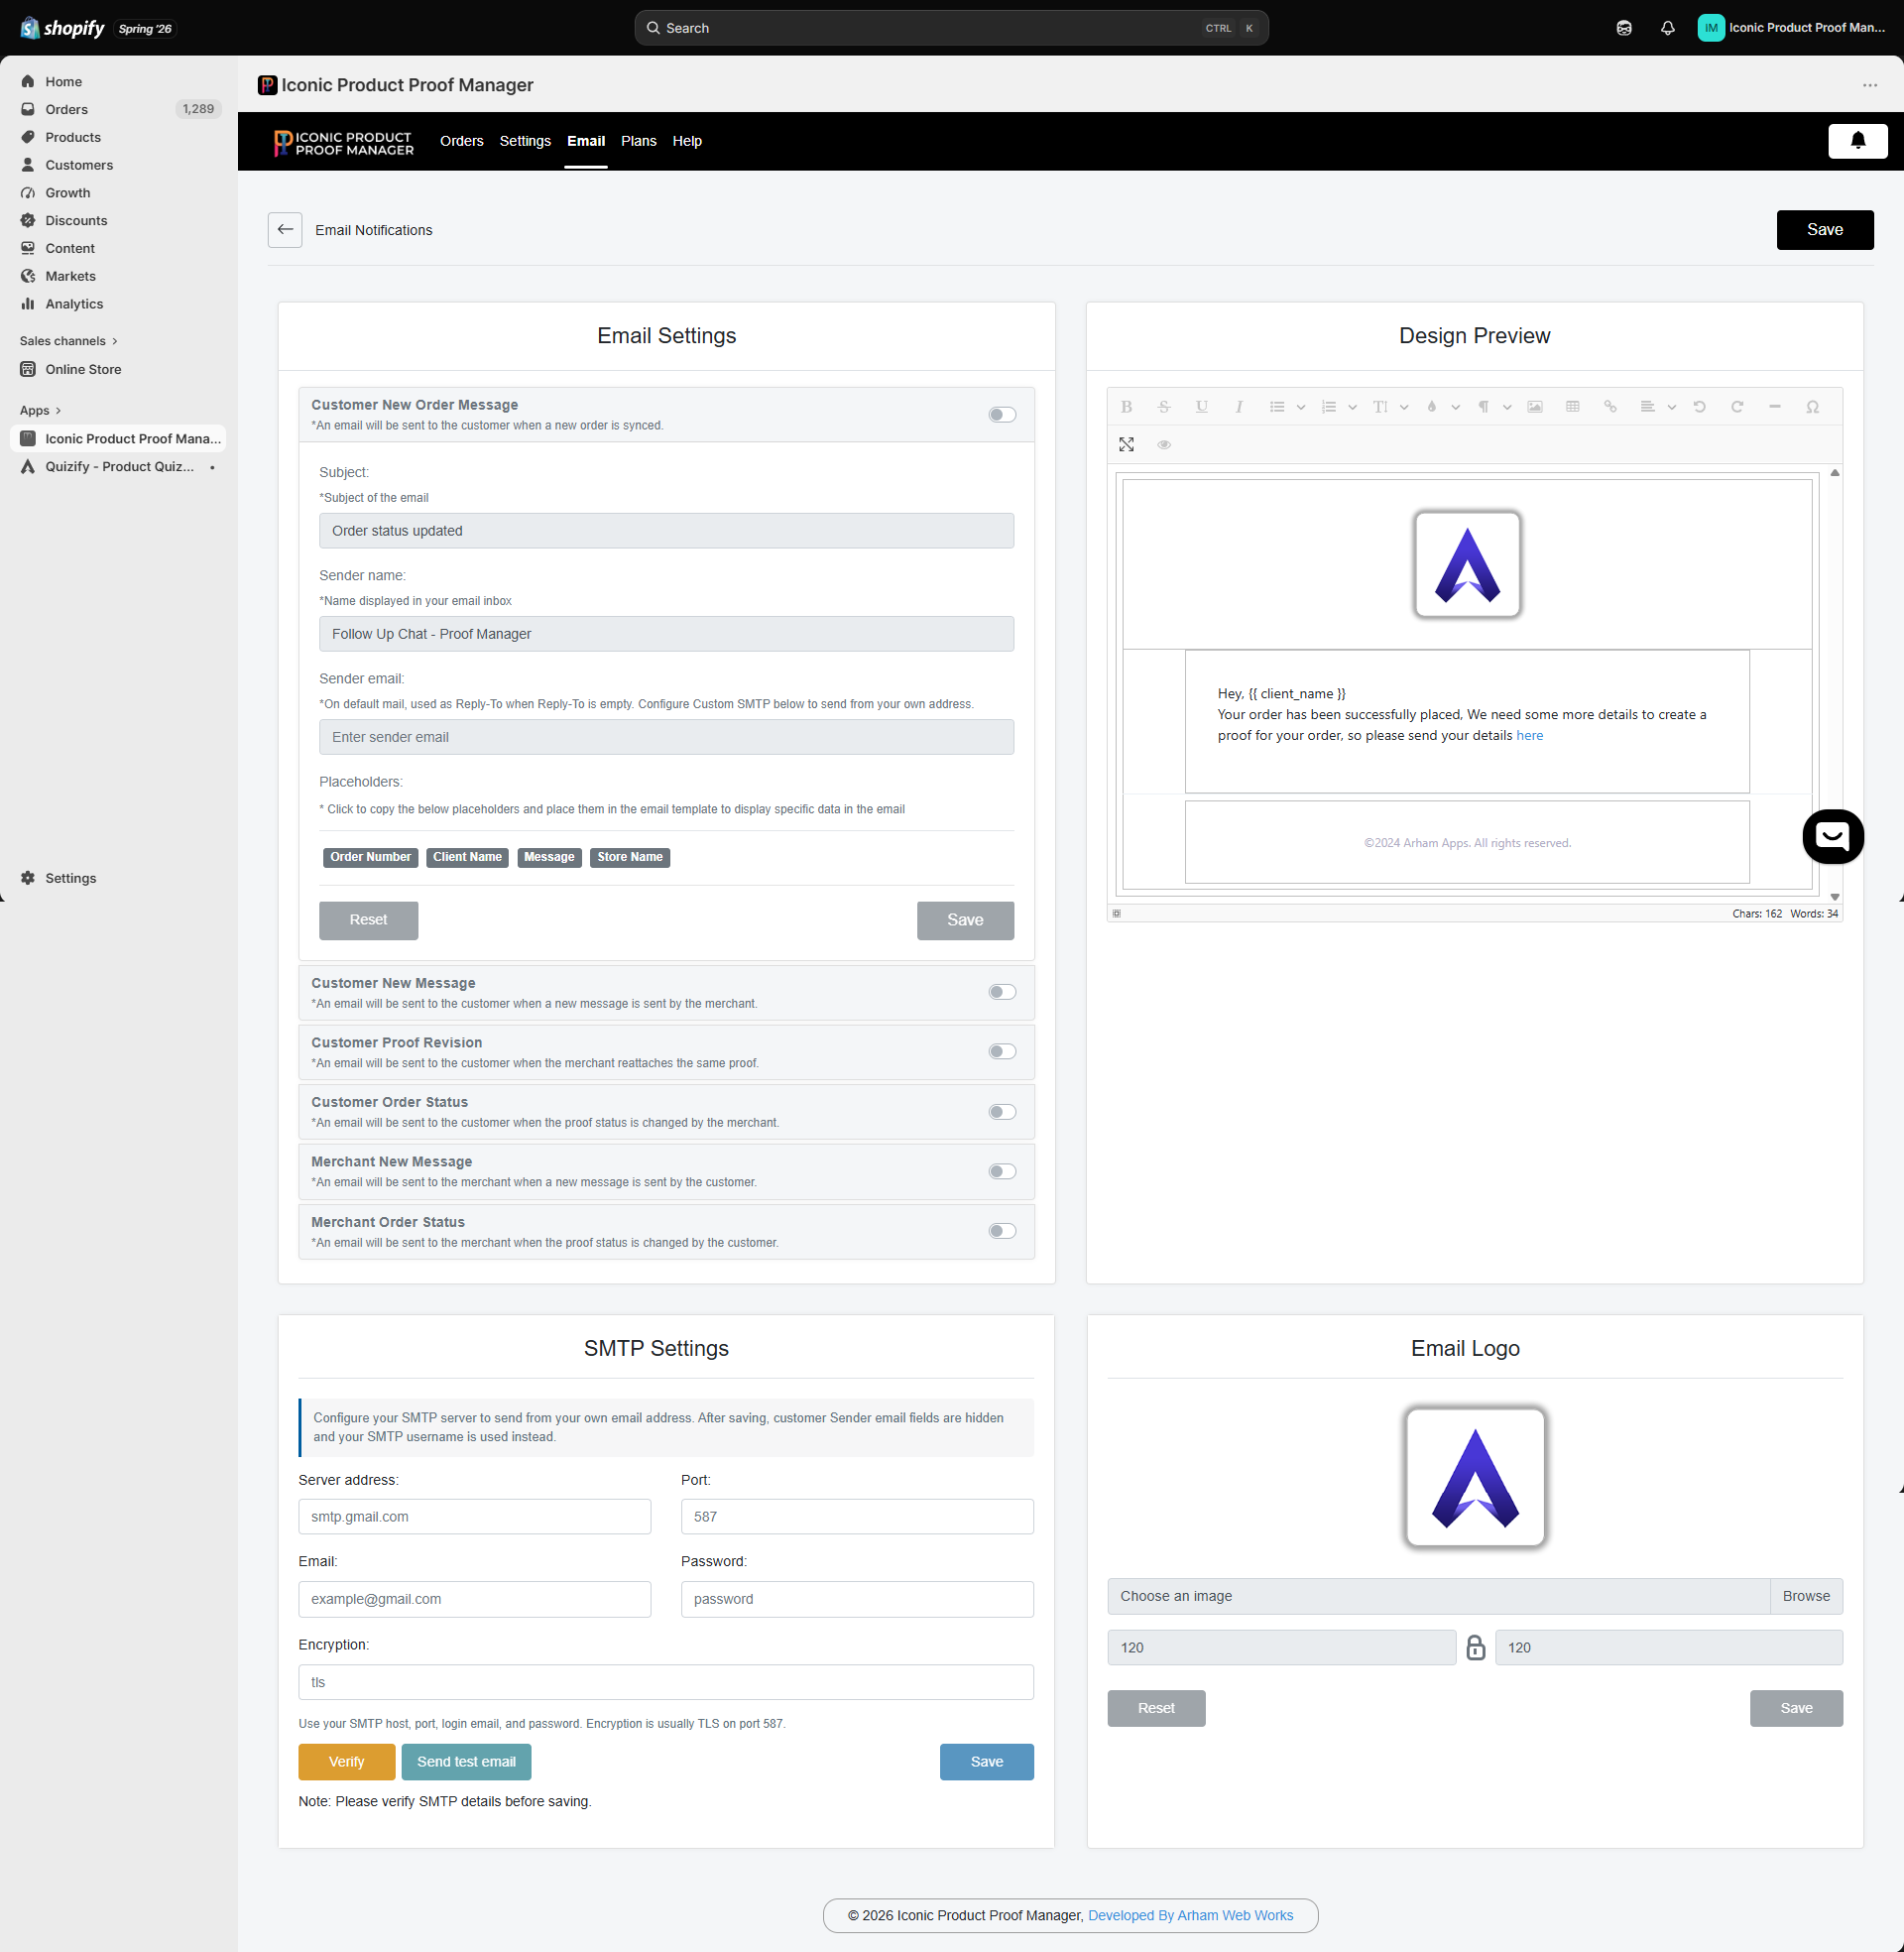
**Email → Email Notifications** controls every automatic email the app can send, with a live **Design Preview** so you can see changes before saving.
 ## Notification types
Each notification has its own on/off toggle, subject line, sender name, and (where applicable) sender email:
| Notification | Sent to | Triggered when |
| ------------------------------ | -------- | ------------------------------------------------------------------------------ |
| **Customer New Order Message** | Customer | A new order is synced — invites the customer to submit details for their proof |
| **Customer New Message** | Customer | You send a new message on their order |
| **Customer Proof Revision** | Customer | You reattach a revised proof file to the same conversation |
| **Customer Order Status** | Customer | You change the order's merchant status |
| **Merchant New Message** | You | The customer sends a new message |
| **Merchant Order Status** | You | The customer approves or rejects a proof |
The **Customer New Order Message** (labeled *Customer New Order Message* on the toggle list) is the entry point for the whole workflow — if it's off, customers on newly synced orders won't know they need to submit details or view their proof unless you message them directly.
## Editing a template
For each notification you can set:
* **Subject** — the email subject line
* **Sender name** — the name shown in the customer's inbox
* **Sender email** — used as the Reply-To address when sending from the app's default mail; configure [Custom SMTP](/email-notifications/02-custom-smtp) to send *from* your own address instead
* **Design** — the email body, edited in the rich text editor with the **Design Preview** on the right
### Placeholders
Click a placeholder chip to insert it into the template — it's replaced with real order data when the email is sent:
| Placeholder | Inserts |
| -------------- | ------------------------------------------------ |
| `Order Number` | The Shopify order number |
| `Client Name` | The customer's name |
| `Message` | The message content (for message-related emails) |
| `Store Name` | Your store name |
Click **Save** under each section to store your changes, or **Reset** to restore the default template.
## Email logo
Under **Email Logo**, upload an image to replace the default logo shown at the top of every notification email. Set the display **width** and **height** in pixels, then **Save**. Use **Reset** to remove your custom logo and go back to the default.
## Notification types
Each notification has its own on/off toggle, subject line, sender name, and (where applicable) sender email:
| Notification | Sent to | Triggered when |
| ------------------------------ | -------- | ------------------------------------------------------------------------------ |
| **Customer New Order Message** | Customer | A new order is synced — invites the customer to submit details for their proof |
| **Customer New Message** | Customer | You send a new message on their order |
| **Customer Proof Revision** | Customer | You reattach a revised proof file to the same conversation |
| **Customer Order Status** | Customer | You change the order's merchant status |
| **Merchant New Message** | You | The customer sends a new message |
| **Merchant Order Status** | You | The customer approves or rejects a proof |
The **Customer New Order Message** (labeled *Customer New Order Message* on the toggle list) is the entry point for the whole workflow — if it's off, customers on newly synced orders won't know they need to submit details or view their proof unless you message them directly.
## Editing a template
For each notification you can set:
* **Subject** — the email subject line
* **Sender name** — the name shown in the customer's inbox
* **Sender email** — used as the Reply-To address when sending from the app's default mail; configure [Custom SMTP](/email-notifications/02-custom-smtp) to send *from* your own address instead
* **Design** — the email body, edited in the rich text editor with the **Design Preview** on the right
### Placeholders
Click a placeholder chip to insert it into the template — it's replaced with real order data when the email is sent:
| Placeholder | Inserts |
| -------------- | ------------------------------------------------ |
| `Order Number` | The Shopify order number |
| `Client Name` | The customer's name |
| `Message` | The message content (for message-related emails) |
| `Store Name` | Your store name |
Click **Save** under each section to store your changes, or **Reset** to restore the default template.
## Email logo
Under **Email Logo**, upload an image to replace the default logo shown at the top of every notification email. Set the display **width** and **height** in pixels, then **Save**. Use **Reset** to remove your custom logo and go back to the default.